Deploying AppGrid - best practices
Mar 27, 2025

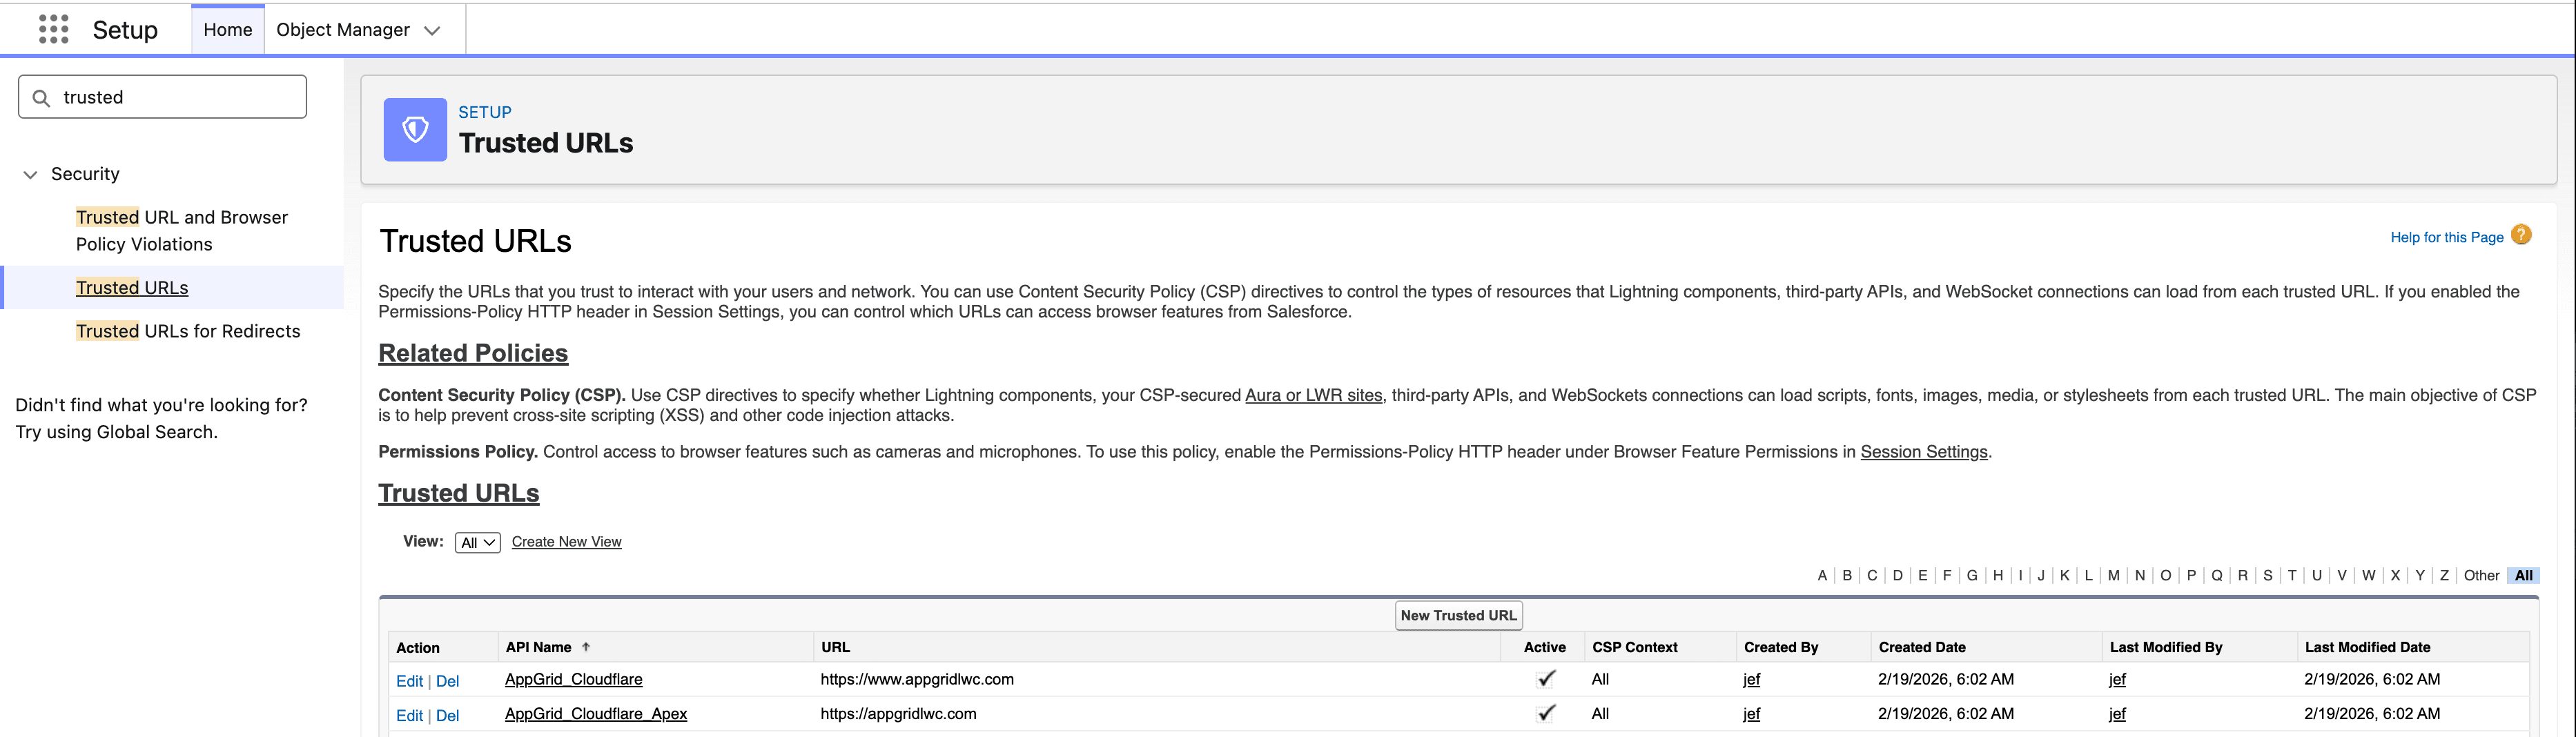
The AppGrid application is served from Cloudflare hosting when the AppGrid LWC component is loaded. Cloudflare is used to improve the loading time of the application. Note: no Salesforce data is accessed by or stored to Cloudflare. It is used solely for the purpose of loading the AppGrid application.
Prior to installing the AppGrid managed package, configure your trusted url settings to allow content to be served by Cloudflare as shown in the image below.
When deploying AppGrid, we want to ensure that the user experience delivered for new users is optimized for their role and workflows. That experience is governed by 3 factors:
Salesforce metadata and permissions
AppGrid grid permissions
AppGrid preferences
It is important that the user who is deploying AppGrid has a thorough understanding of all the features AppGrid provides, an understanding of how Salesforce profiles and permissions work and how to use the application.
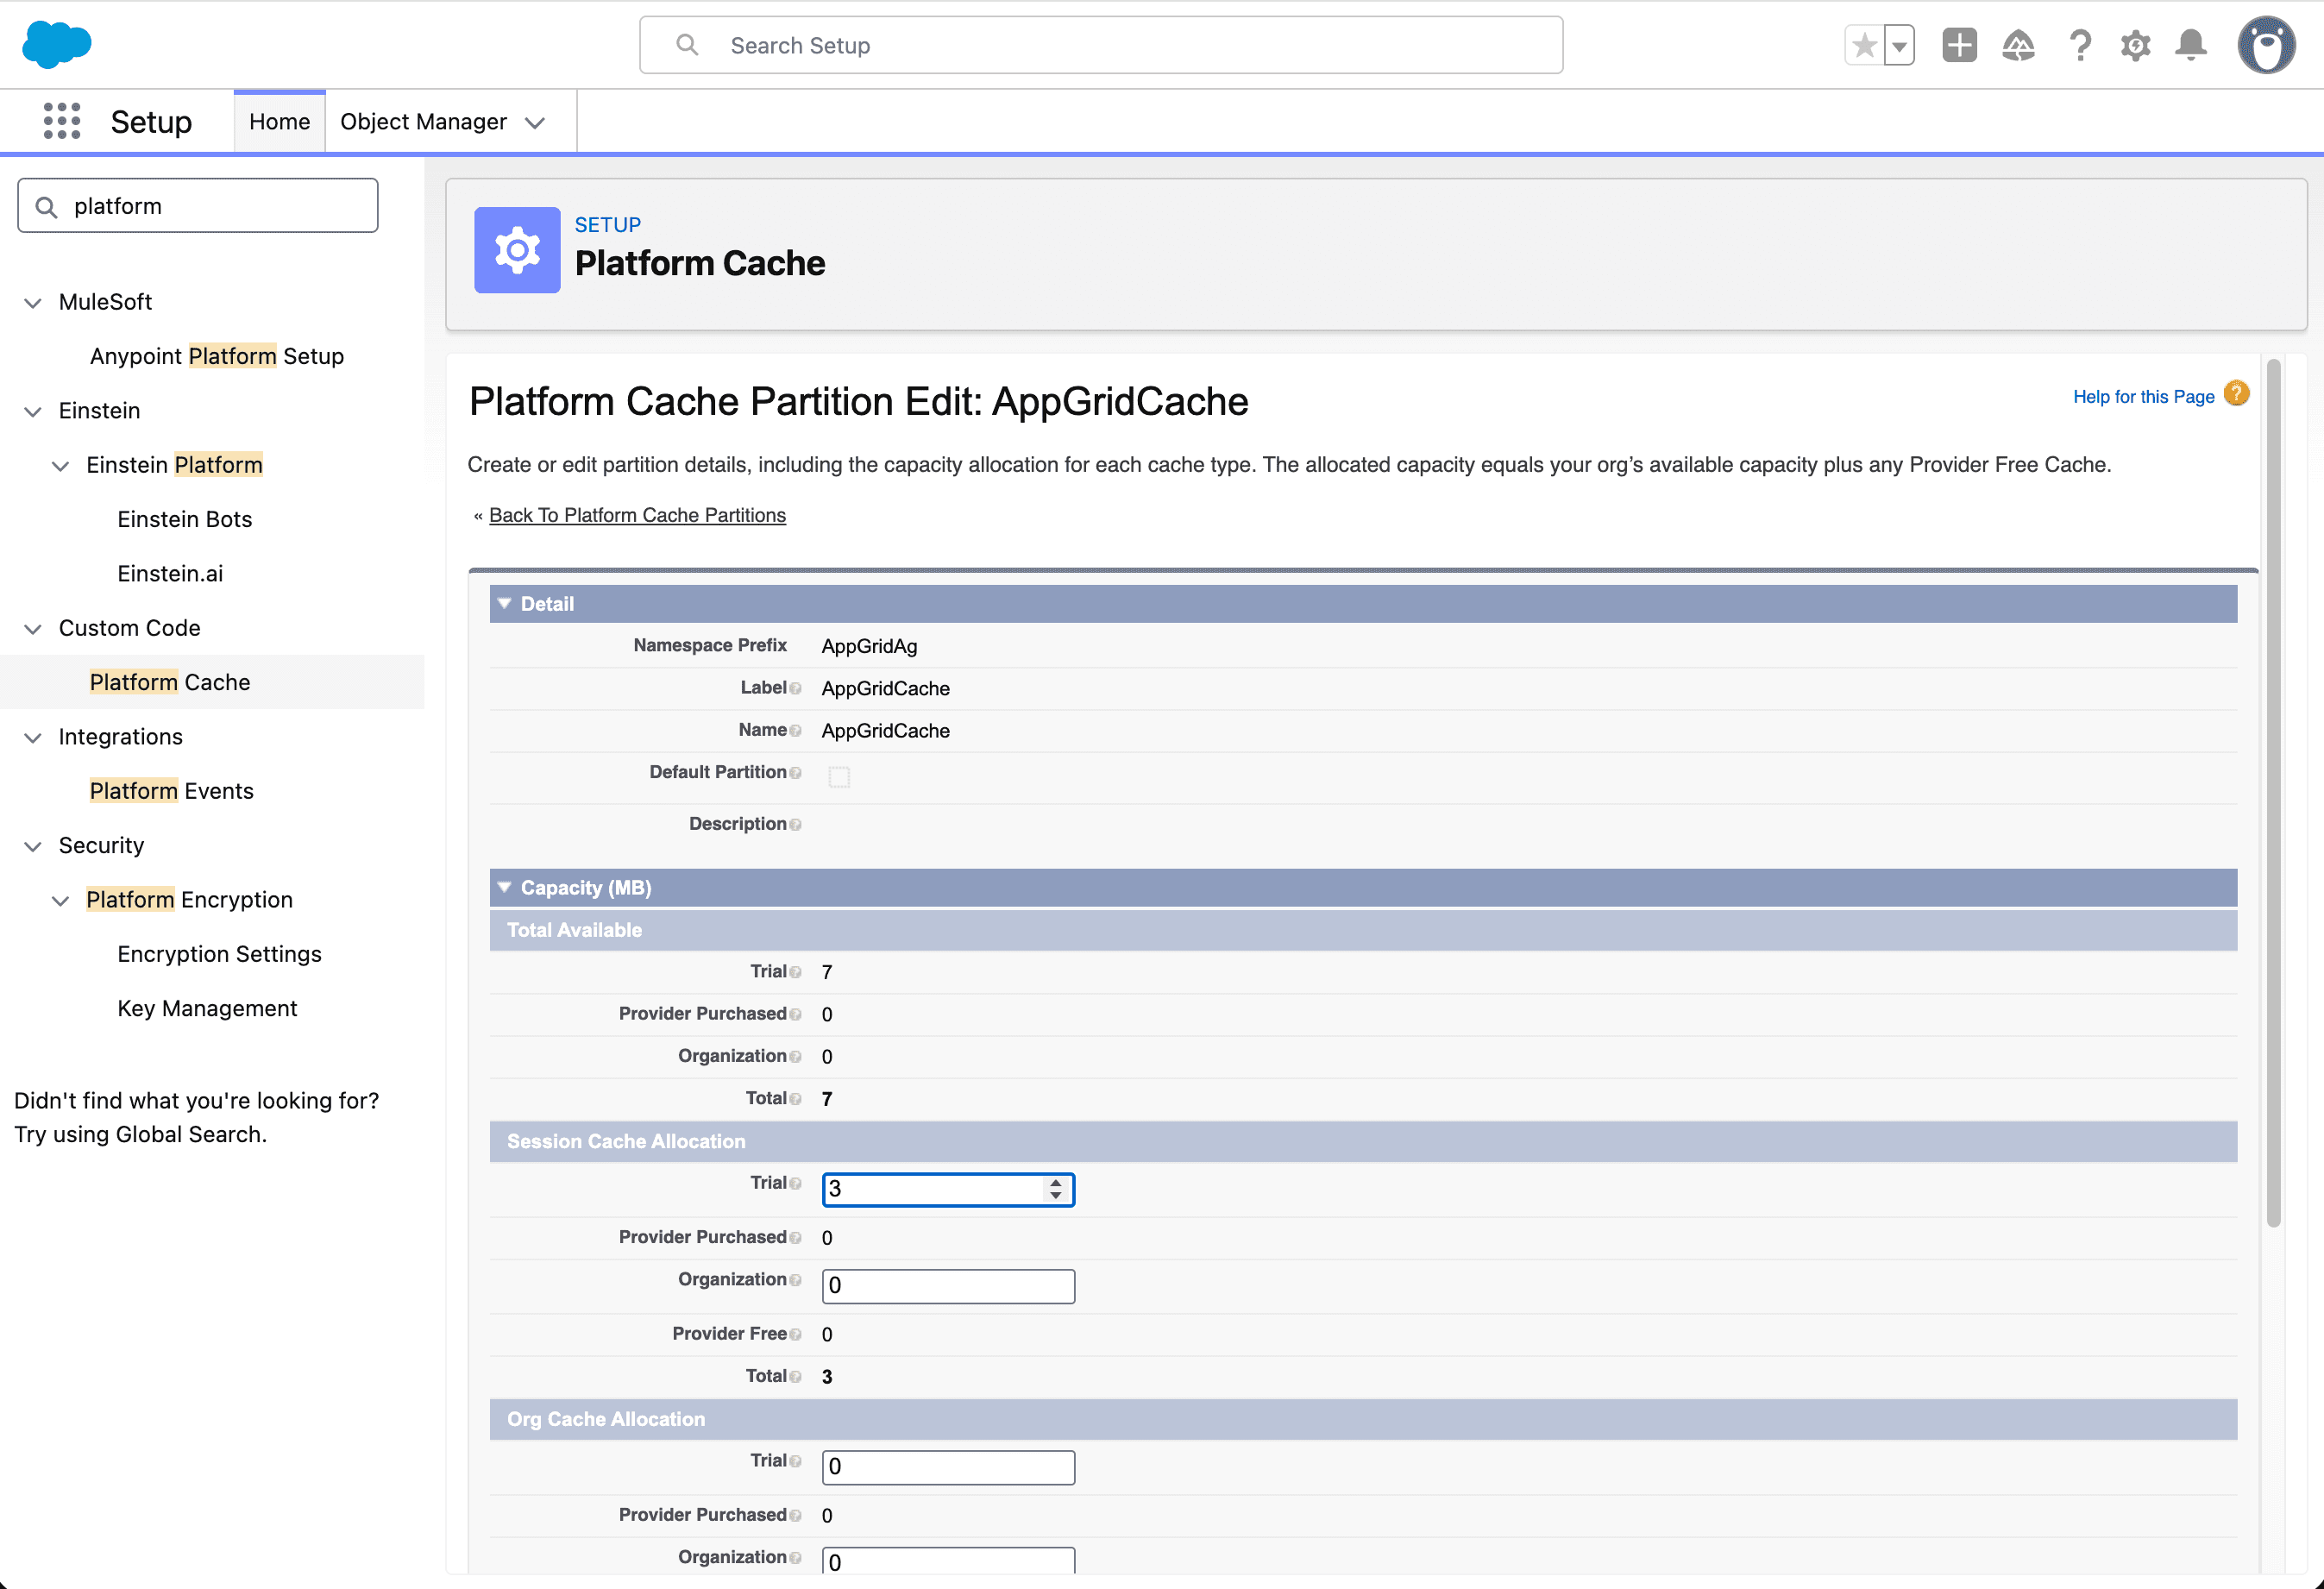
AppGrid provides a platform cache as part of the managed package. Assign 3 MB to the cache as shown in the image below.
If you plan on using the AppGrid Slack integration, review the blog post 'Configuring the Slack Service'.
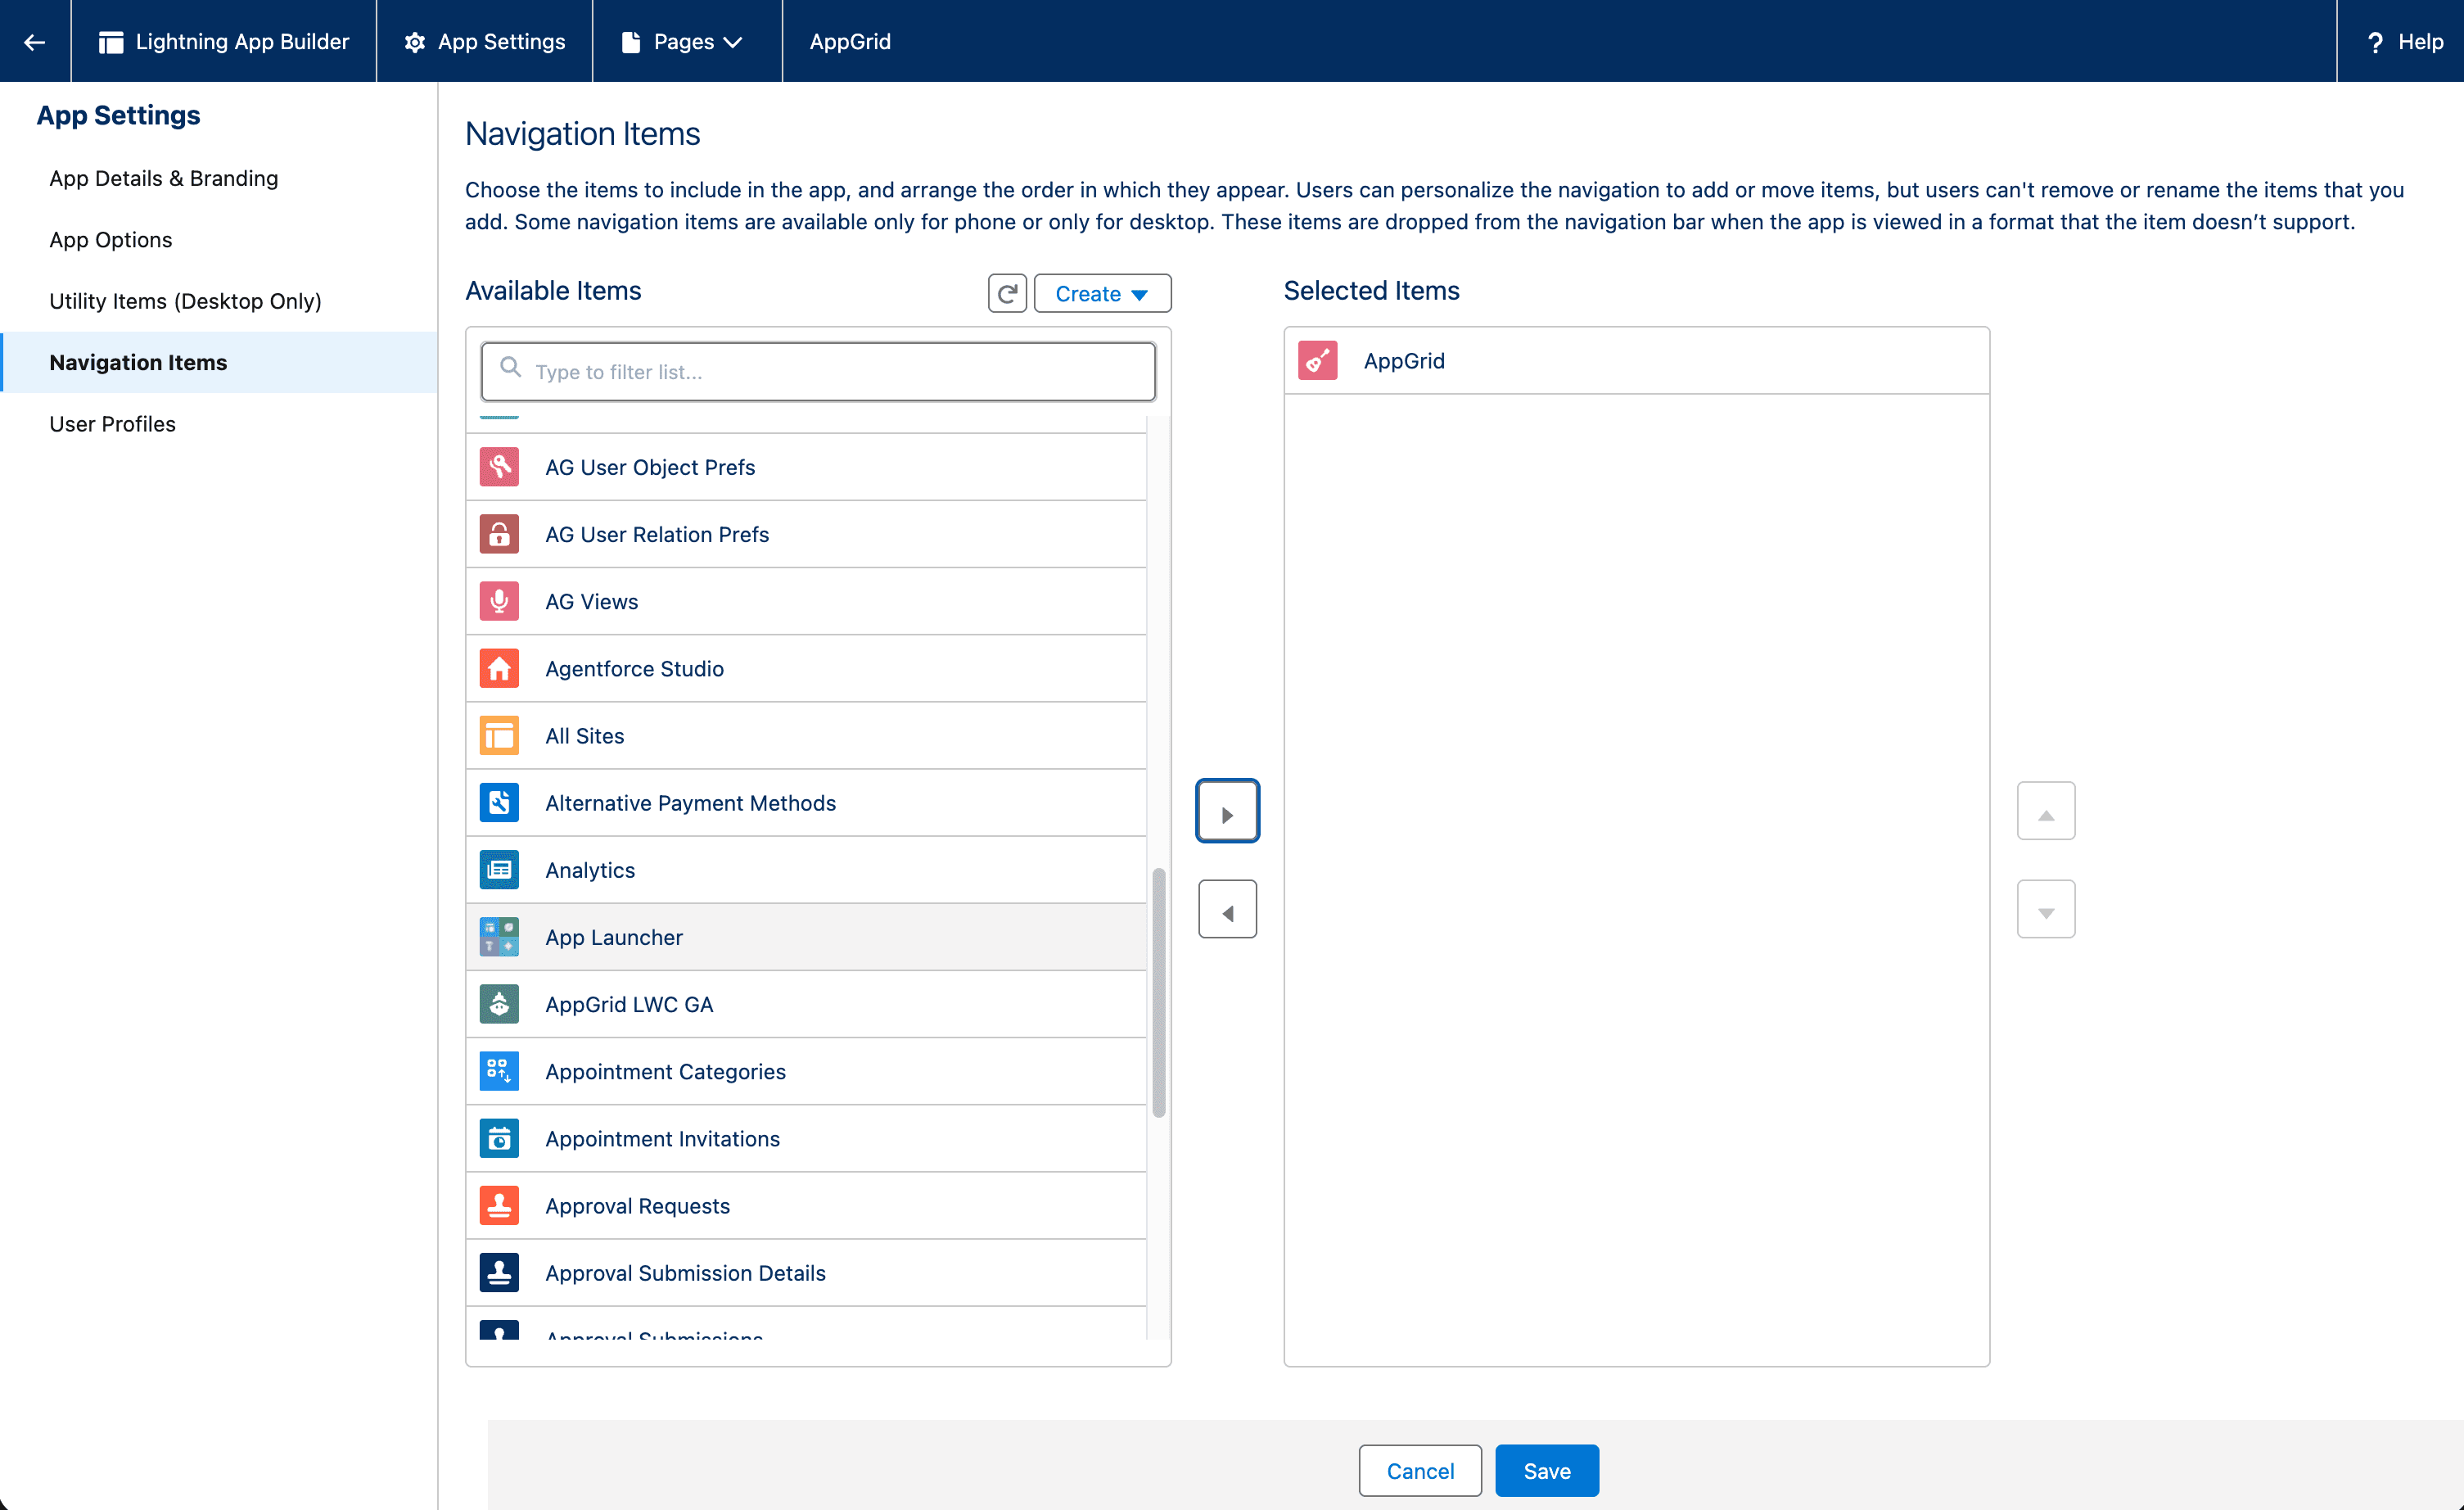
Using the Salesforce app manager, assign either the AppGrid Lightning Page or AppGrid Lightning Tab. If your Lightning page will only contain AppGrid, choose the AppGrid Lightning tab as your component as shown in the image below.
AppGrid provides a Salesforce permission set ('AppGrid User Access') that should be assigned to each user prior to deployment. Note: if you intend to use the AppGrid permission set, it is highly recommended that you review and modify this permission set before deploying, as it may not provide the permissions your users require or conversely, provide more than you need.
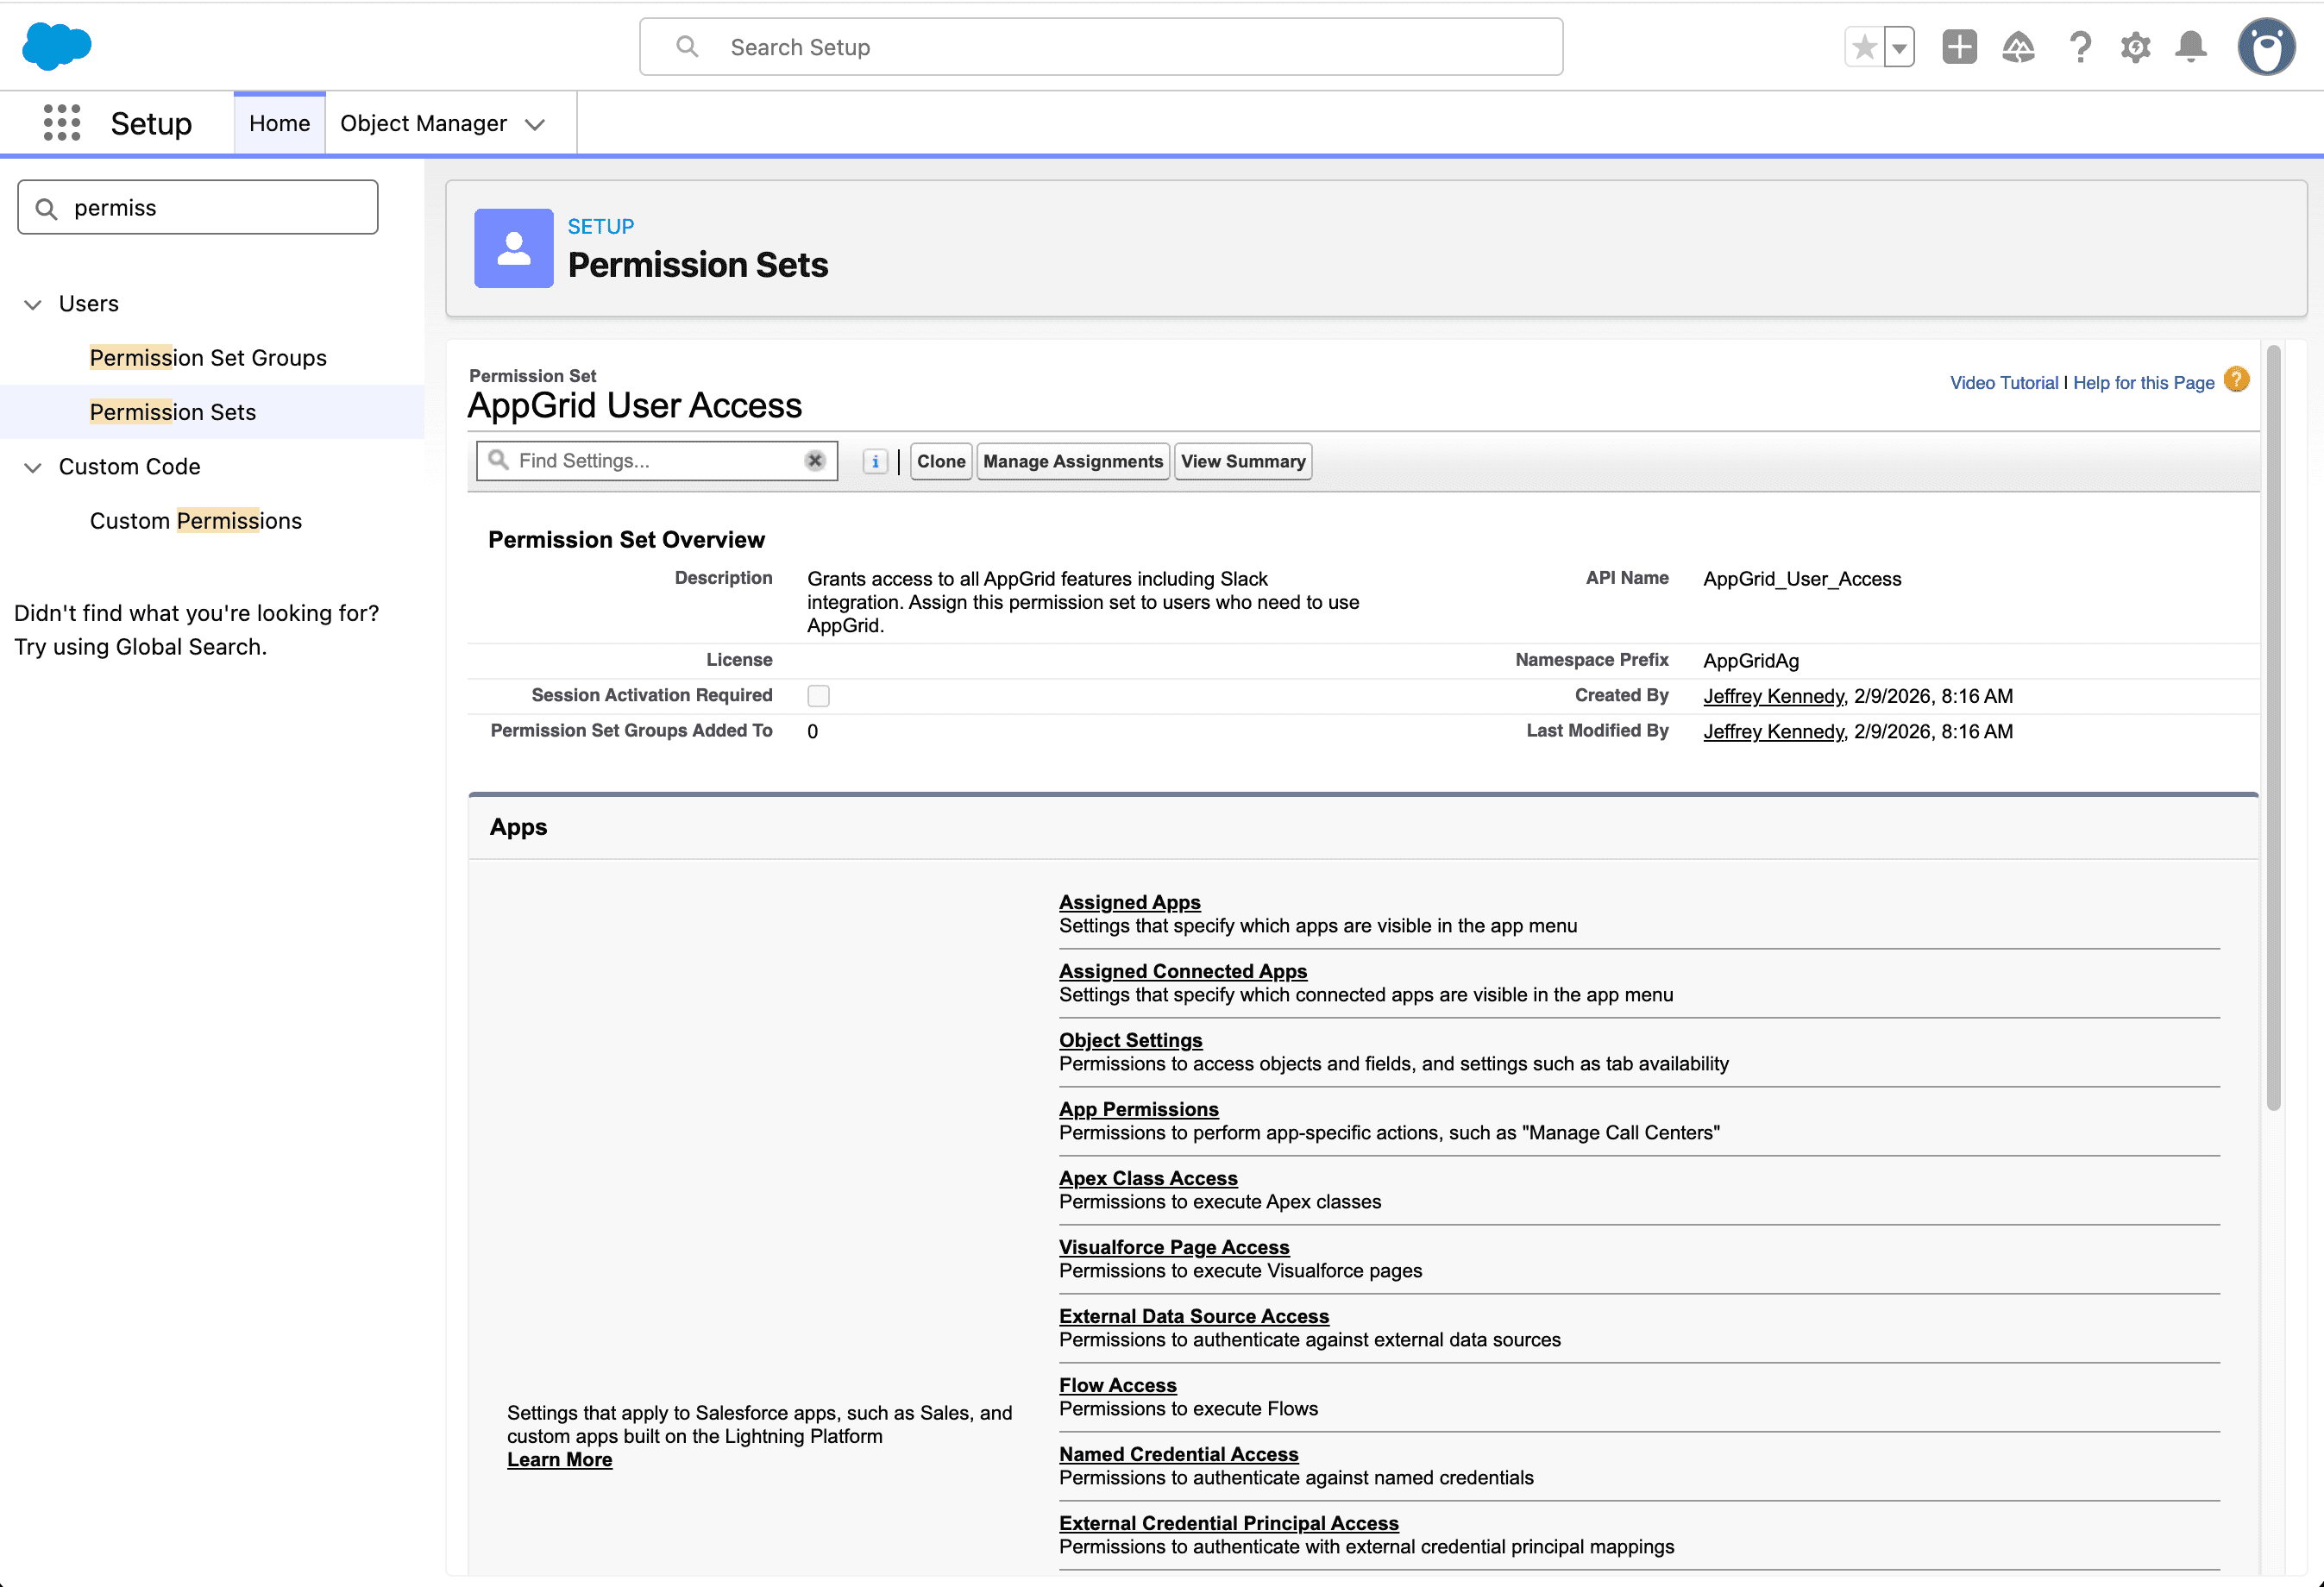
You can create your own permission set if more customization is required. This ensures that the user will a) have access to the AppGrid custom objects and classes that are required for AppGrid operation and b) any standard or custom objects your users may need. Of course, you can create multiple permission sets for different types of users if required. Prior to performing the deployment process described below, assign the appropriate permission set to all users that will be using AppGrid.
AppGrid has various grid permissions that control what features are enabled for a given user. We want to tailor these settings for the type of user who will be using AppGrid. If no grid permission preferences have been defined, by default all grid permissions will be enabled.
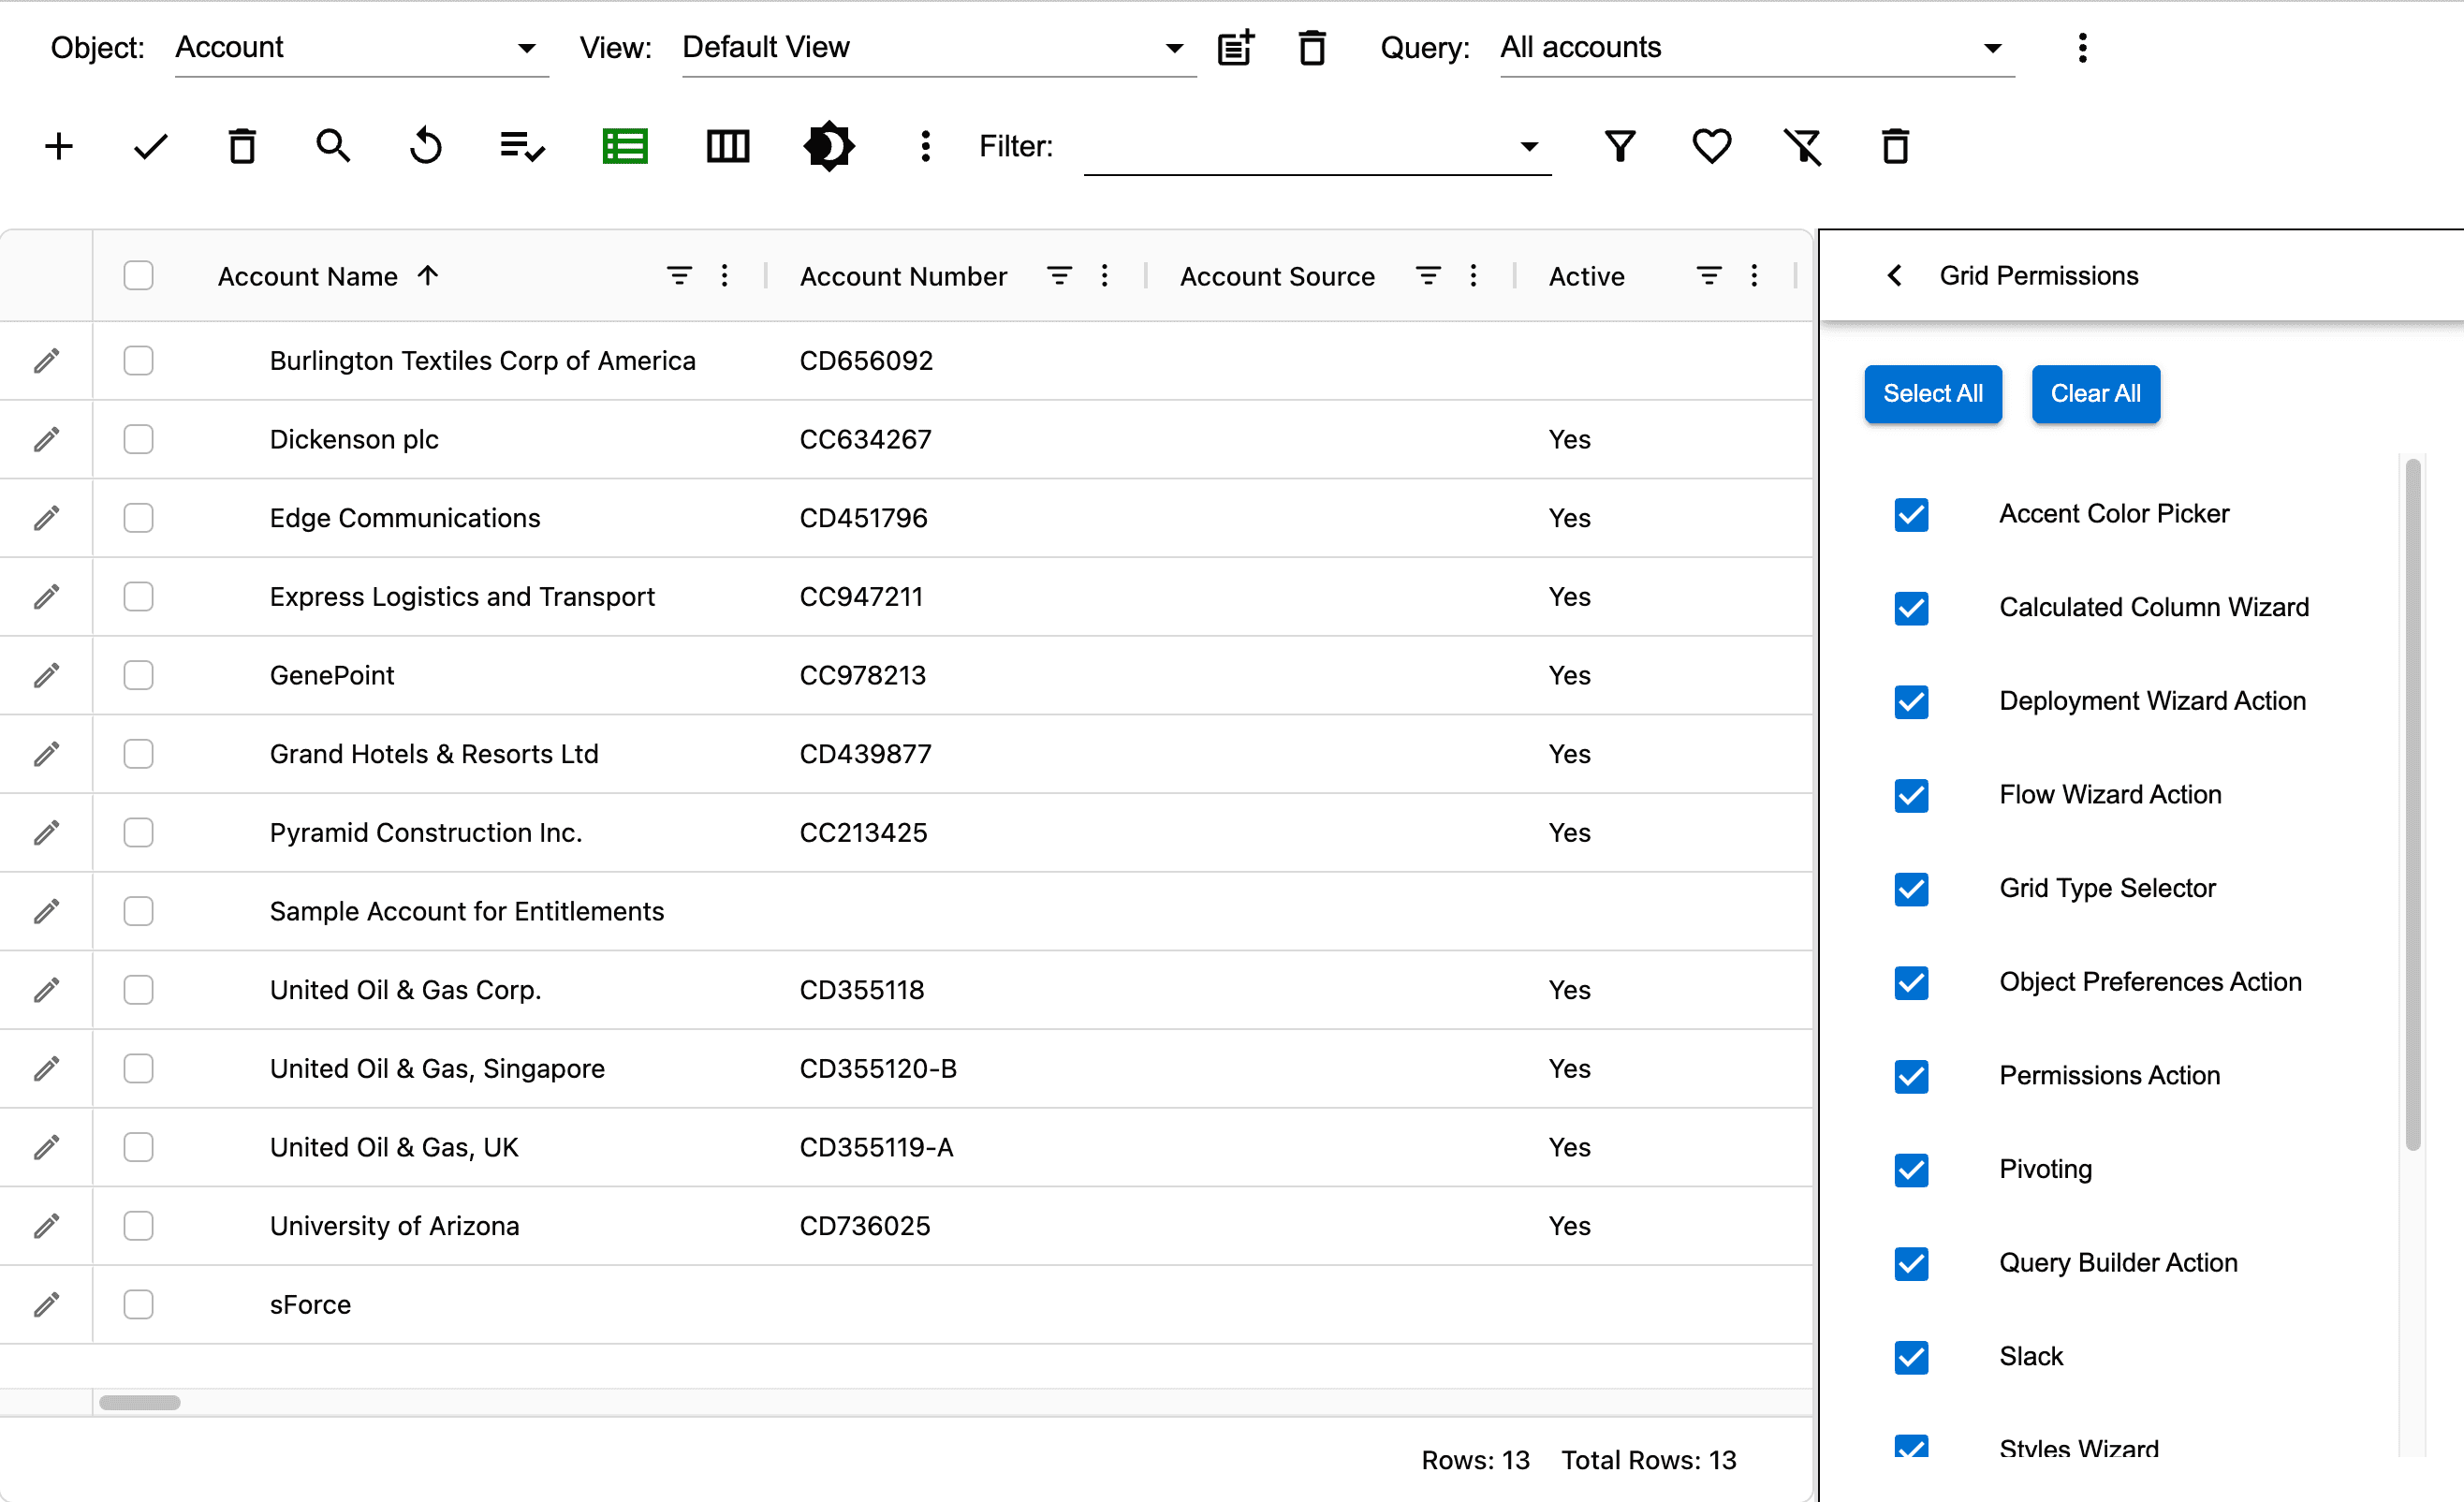
AppGrid grid permissions allow great flexibility when creating applications. We could create an AppGrid application that we want to provide for customers or partners, and want that app to be simple to use and restricted in what features we provide. Conversely, we may want to enable all AppGrid features for power users or system administrators.
AppGrid preferences are metadata that effect the grid state. As a user interacts with the app, the grid state will be saved into the following preferences:
Object Preferences - controls what objects are displayed in the AppGrid object selector
Relation Preferences - controls what sub-grids are displayed for a given object
View Preferences - controls what predefined views are displayed in the view selector for a given object.
Grid Preferences - remembers the last view and query used for each object
Query Preferences - controls what predefined queries are displayed in the query selector
Chart Preferences - controls what predefined charts are displayed in the chart selector
Flow Preferences - controls what predefined flows will be displayed in the flow selector for a given object
Treegrid Preferences - controls the tree grid settings needed for rendering the tree grid
Timeseries Preferences - controls the time series grid settings needed for rendering the time series grid
GridTemplate Preferences - controls what predefined grid templates are shown in the grid template selector in the deployment panel
By predefining the grid preferences for a given user, we ensure that the initial user experience is optimal and users can execute their workflows immediately without creating any additional preferences.
Deployment Process
Let's assume we are deploying AppGrid for 2 different types of users - Sales and Customer Service. At a high level, what we are going to do is have a system administrator use the app to configure the preferences that a given user type will require, and then create a AppGrid template from those preferences. We will then assign that template to each user of that type. This is analogous to creating and assigning a profile (or permission set) in Salesforce.
Using the Salesforce Login-As feature, a System Administrator logs in to a user account for a given user type (note: the default GridType is GridView)
Open the object preferences panel and select one or more object preferences. The object selector will be populated with the selected objects.
Then for each object in the object selector:
When a user selects an object from the object selector, a default list view (named 'Default view' will be created if no views exist. You can modify this view or create a new view. Note: a notification will appear alerting you that no queries were found. Click Dismiss for now. We will create the queries in step 3. Open the columns wizard and select what fields you want to display and adjust the field order (by dragging the fields in the list) as desired. We should always have a list view defined, and optionally a grouped view or pivot view.
Click the search button in the grid actions toolbar and create one or more queries
Open the object preferences panel and select one or more relation preferences
Execute one of the queries
Optionally, sort by one or more columns
Optionally, create one or more advanced filters
Optionally, create one or more charts
Optionally, create one or more flows
Expand the subgrids for a given row. For each subgrid:
Create one or more views
Optionally, create one or more charts
Optionally, create one or more grid filters
close the subgrid row
Optionally, select a different grid type (time series or tree grid). Configure the grid type settings as required.
Open the grid permissions panel. Select the permissions appropriate for the given user type.
Close the login-as session
Deploying the preferences
Log back into the app as a system administrator
Open the deployment panel and select the USER CONFIG tab
Search for the user we created
Click the save button to create a AppGrid template and provide a template name.
Click on the TEMPLATE tab in the deployment panel.
Select the template you created
Select the Salesforce profile type. The users assigned to this profile will be displayed
Select one or more users
Click the ASSIGN TEMPLATE button
Rinse and repeat for each type of user.
We recommend deploying AppGrid in a sandbox and having a UAT process where a sample user of each type can try out AppGrid to ensure their configuration meets their needs.